
If you have all the welding gear but no cart to stow it on, you’ve come to the right place. Joe Mooney from Homesteadonomics ran into the same problem after he got his new Forney 190 MP welder. Follow these step by step instructions and you can create your very own three shelf welding cart.
Tools and Materials
- Scrap Steel
- Magnets
- Forney 190 MP
- Sheet Metal
- Galvanized steel
- Expanded metal
- Wheels (two sizes)
Project Prep
Always remember to practice safe metalworking habits by wearing the proper personal protective equipment. A fire-resistant welding jacket or apron and sleeves, welding gloves, safety glasses and a welding helmet are vital to protect yourself against dangerous arc flashes and sparks.
Step By Step Assembly
Begin by tacking together the lower shelf. This shelf will eventually hold the wheels and the uprights that will hold the upper two shelves.

Using tack welds and your magnets, begin forming the skeleton of the cart. Use the magnets to hold up the second and third shelves, and tack them in.

Create a diagonal support from recessed metal. This diagonal support can serve two main purposes: to give the cart stability and support, and making it look super cool.
*Here Joe used tubing, but you can also use flat scrap pieces or a gusset triangle!

Next, from the same recessed metal create and tack weld cross supports for the shelves. This step is to ensure you can put sheet metal on the shelves.

After you finish the mainframe, you can begin creating a tool box out of galvanized steel for the second shelf of the cart. This box can also act as a drawer.
*It is not generally recommended to weld with galvanized metal due to the toxic fumes it releases. Joe suggests using regular sheet steel and paint it later.

Now, grab your expanded metal and begin creating the bottom of drawer/tool box. You will be adding wheels to make it a sliding option.

Now, attach the bigger wheels to the back end of your cart to make it mobile.

Next, add the smaller wheels to the front end of your cart. With two sets of wheels your cart and your machines can travel with ease.

For your final touch-ups, add sheet metal to the top and bottom shelves of the cart for a more refined look.


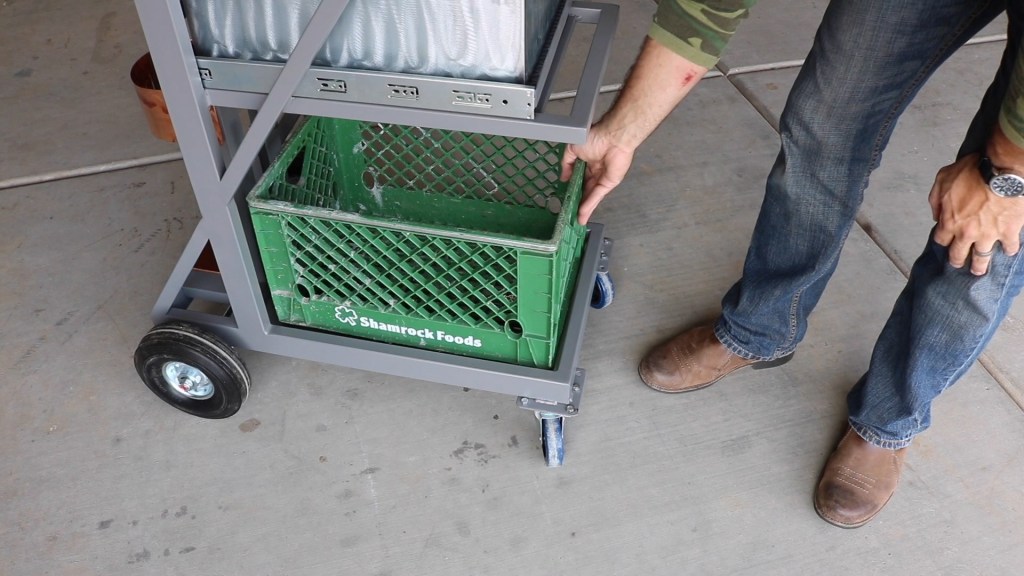
If you want to get really fancy, you can add fun and functional features to your cart such as a hook for a welding helmet or clamps, a milk crate for extra storage, or a bottle bracket for your gas tank.


Now step back and take a gander at the great addition to your tool bench!
For a step by step video of this project courtesy of Joe Mooney visit the Homesteadonomics YouTube page.
For more step by step tutorials and videos visit askforney.com

Fancy but not usable in conditions when floor surface isnt perfectly flat, or there is need to pass over some obstacles (such as cables, pipes or other stuff lying on a floor) cause welder can easily fall down off that shelf, (same as due accidental push or strike)